Aeropress Basics

Friday, September 18th, 2015 by


DSCN1204

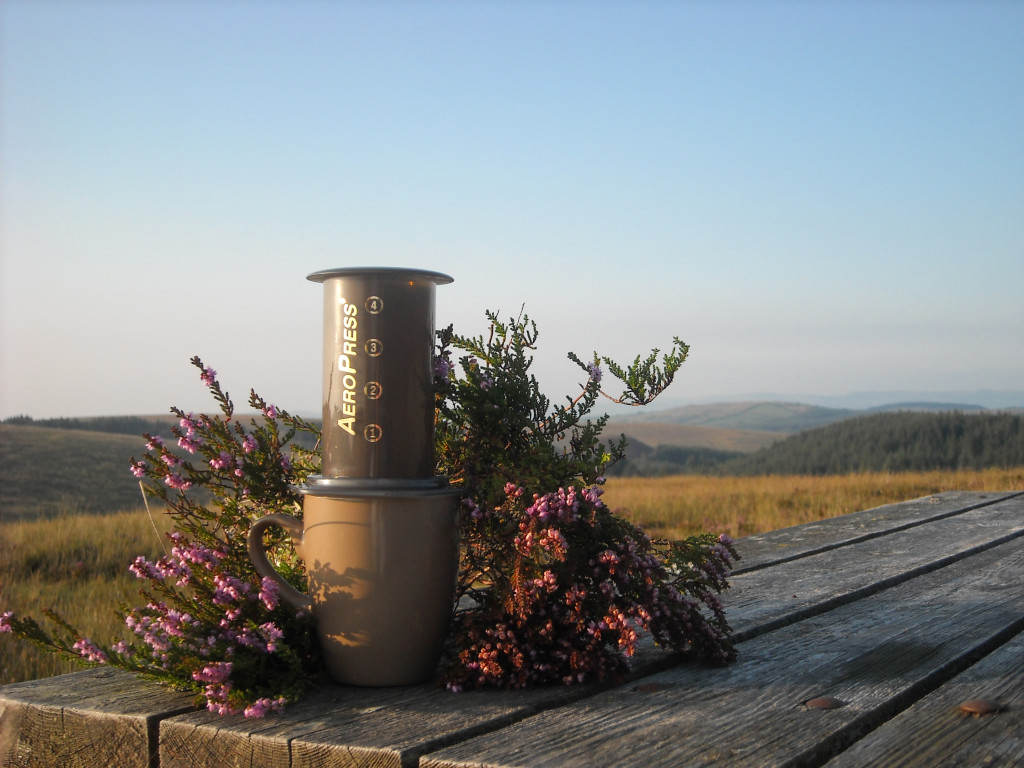
The TSA-friendly Aeropress, on vacation in County Monaghan, Ireland.

We love the Aeropress. Why? It’s easy to use, affordable, compact, and produces a rich, flavorful cup of coffee. If you’re brewing for one (or two), it takes up a heck of a lot less space on a kitchen counter than an automatic drip brewer, though the shape may raise some eyebrows. The Aeropress loves to travel, it’s quick to use, and easy to clean. It fits great in a backpack or even a purse — take it to the office or on your next camping trip. Ready to try it? Here are the basics:

Brewing Instructions

  1. Boil some water and let it cool for about a minute.
  2. Place a filter inside the cap and place the Aeropress over your mug without the plunger inside.
  3. Wet the filter slightly with a little warm water.
  4. Pour in 2 scoops of finely ground coffee (we use a grind slightly finer than standard autodrip). A plastic funnel comes with the Aeropress for this purpose, but you may find that you don’t need it.
  5. Add the hot water until it reaches the number four.
  6. Stir (Aeropress comes with a little paddle).
  7. Insert plunger and PRESS firmly.

You’re done! Drink as is or dilute it with hot water to taste.

Aero2steam

Once you’ve got this down, give the reverse method a try. The coffee steeps a little longer in the hot water, producing a flavor closer to French press coffee.
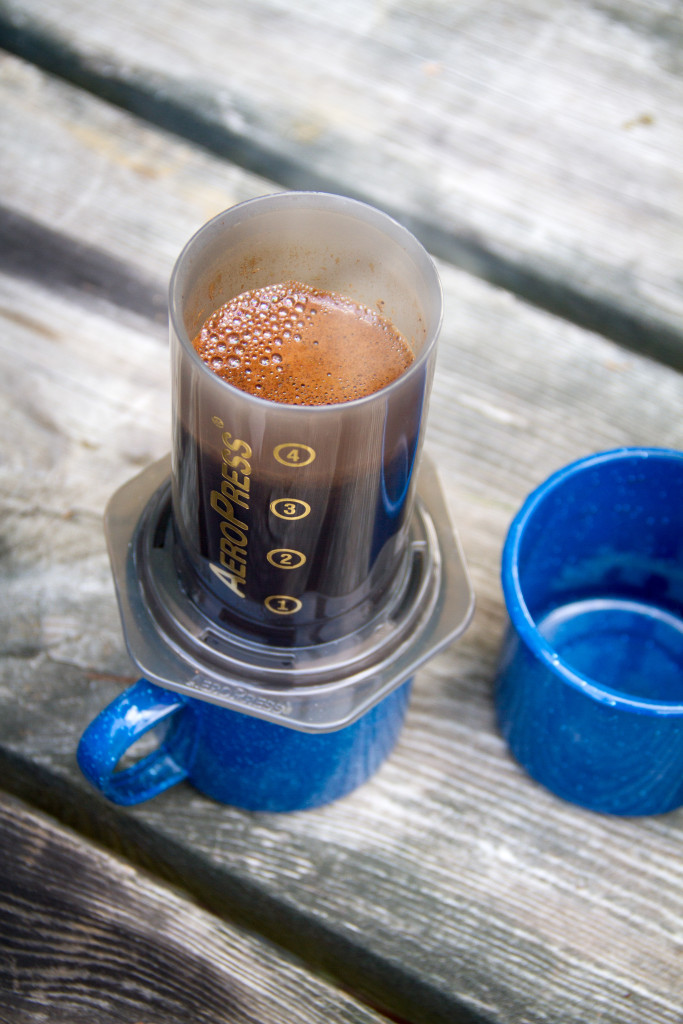
The Reverse Method

  1. Start with the plunger in the Aeropress and flip upside-down so the top of the plunger is resting your mug.
  2. Pour in two scoops of finely ground coffee.
  3. Hold the cylinder steady over the cup and add hot water until nearly full.
  4. Stir with your paddle.
  5. Steep for one minute (you might want to experiment with steep time to get the flavor you like).
  6. Attach the cap with a filter inside.
  7. Flip it, carefully, and place over your mug.
  8. PRESS.

There you go. Two easy methods, two great cups of coffee. One weird looking tube thing no one would ever guess has anything to do with coffee. Enjoy!

Photo credit, top: Stacey Meola


Simple Pour Over Coffee: How to Hario

Friday, May 15th, 2015 by

Why would a person make drip coffee by hand, when there are machines for that?

If you’ve noticed the line moving more slowly at your local fancy coffee shop, pour over coffee may be to blame. The basic process involves pouring water by hand in a slow stream through grounds in a filter to produce a single cup or small batch. If this sounds like what your drip machine does, but slowly and with lots of room for human error, you are correct.

So why is this popular? Pour over is known for having a fuller, more complex flavor than automatic drip coffee, and a brighter, less heavy flavor than French press. Not necessarily better, it can yield different or a range of results from the same coffee depending on the pour. Control over the temperature and flow of the water allows for more control over the flavor profile of the end result.

If you’re interested, but doubt your ability to manage more than a push of a button in the morning, you might be wondering if manual brewers are worth the effort. We picked the Hario V60 system to demonstrate how simple the process can be. If you use an automatic brewer, you already know the basic steps by heart: place coffee in a filter, place a filter in a cone, and add water. The big difference is that you pour the water by hand. You might want to experiment a little to get your pour down pat, but once you know the drill, you can easily make this a part of your routine.


Simple Pour Over Coffee: How to Hario from Coffee Bean Direct on Vimeo.

What you’ll need:

Hario V60 Dripper

Hario V60 Range Server

Hario V60 filters

Coffee

Tablespoon

Directions:

  1. Boil some water in a kettle. The Hario we’re using holds 20 oz, but you can also brew a single serving with the same equipment. After boiling, set aside.
  1. Fold a V60 paper filter along the seam for a better fit and place it in the dripper.
  1. Optional: lightly wet the entire filter with a little hot water. With the dripper attached, pour the hot water out once it has drained through.
  1. Place ground coffee into the filter. We recommend 2 tablespoons (1 coffee scoop) of medium-fine coffee per 6 oz of water. If you want to be fancy, level the grounds and make a divot in the center. This will encourage drainage though the grounds.
  1. Pour just enough water into the filter to wet all the grounds and wait 45-60 seconds, about the time it takes to find a pop-tart and stick it in the toaster.
  1. Slowly pour the remaining water over the grounds. The key to doing this right is to pour very slowly in circular motion and to keep the stream of water on the coffee. Try to avoid hitting the filter or the center directly. This is easier with a thin-spouted kettle, but any kettle or teapot can work if you go slow and keep the stream as fine as you can.
  1. While the last of the water is draining, give the grounds a stir with a spoon.
  1. Replace the dripper with the top of the server and swirl the carafe.
  1. Pour, drink, and get on with your day.

Matcha: 800 years of history, culture, and wisdom in a neat little can

Friday, November 14th, 2014 by

Matcha

It only took us 8 centuries, but Coffee Bean Direct is proud to say, “we finally carry matcha!”

Famous for being the only tea used in the formal Japanese Tea Ceremony known as chado or “the way of tea,” matcha is stone ground green tea powder. Only the highest quality shade grown green tea is used. The soft and supple leaves at the top of the tea plant are picked by hand then processed to remove the veins, stems, and impurities. The result, known as tencha, is stone ground into a fine powder. Over-grinding can give matcha a burnt taste, so the process must be done very slowly and with great care. It takes about 1 hour to produce 1 ounce.

Matcha’s origins began in China, but the tea took on a whole new life in Japan where it was forever tied to Zen spirituality. A Japanese monk named Eisai brought the tea to Japan in 1191 AD after studying Buddhism in China. Eisai is credited with spreading both green tea and Zen teachings throughout Japan. In the 1500s Zen monks in Japan turned making matcha tea into the ritual of chado. Today, matcha is such a large part of Japanese culture that only about 4% is exported out of the country.

But what does it taste like!?

Matcha has a flavor that is uniquely distinct from all other green teas. While many green teas are vegetal or grassy, matcha is savory. The frothy green tea is smooth, creamy, and delicious. In general, matcha is historically famous for its bitter flavor and is often served with a small piece of candy to counteract the taste. However Yame Matcha, a high grade of premium matcha, has absolutely no bitterness or astringency at all, instead it is subtly sweet, with a soft creamy mouth feel.

Yame Matcha earns its amazing flavor and qualities from the garden in which it is grown. Yame is located in the southern part of the Fukuoka prefecture on Kyushu Island in Japan. Japanese lovers of green tea know of Yame’s long tea history; warm in the day, cold at night, with just the right amount of rainfall to make ideal growing conditions for cultivating the highest quality of green tea. The area is famous for growing teas that are both sweet and rich. Yame is famous for producing award winning teas time and time again. Each year the highest quality matcha and Gyokuro teas come from Yame. This very matcha was first runner up at the 2010 World Tea Expo.

This sweeter tasting matcha has become very popular in both Japan and America. Matcha is used to make green tea ice cream and in Japan many sweets are flavored with matcha, including famous brands like Pocky and Nestle Kit Kat bars. In America, matcha is very often used in baked goods, green tea lattes, and frozen drinks (check out our recipe for matcha sugar cookies). 

How do you prepare Matcha?

Matcha is meant to be served frothy, with a nice foamy head. The beauty of matcha is that you can make it instantly—no tea bags or steep times. Simply add a small amount of the powder to hot or cold water. The only “rule” is to not use boiling water (about 175° Fahrenheit will suffice). Matcha can be enjoyed thin or thick, ranging from 1/3 of a teaspoon to 2 heaping teaspoons for 3 ounces of hot water. 1 gram of tea in a 16-oz bottle of water will make a perfect light, creamy tea.

Traditionally matcha is whisked to perfection during the tea ceremony. Many people will use a small, battery powered milk frother. Around the office at Tattle Tea, you will frequently see people dropping a small amount of matcha into a bottle or air-tight thermos and then shaking vigorously (PLEASE make sure your lid is screwed on nice and tight and your thermos will not leak before you begin shaking scalding hot liquid!)

Matcha 1

The Japanese Tea Ceremony is deliberately slow and drawn out. The purpose is to force you to stop and appreciate the beauty in simple things, like a perfect cup of hot tea. Truly, there is something special about creating the perfect cup of matcha—you experience something subtle yet sublime.

Unfortunately most Americans do not have time to “stop and smell the roses.” This is sad, because with our hectic schedules, we could really benefit from a slow-down every now and again. Luckily, every tiny grain of matcha powder is infused with 800 years of wisdom and enlightenment. Whether you make your matcha on-the-go, or have time to sit, relax, and see the beauty in the mundane, it can still be a Zen experience. Whisked, stirred or shaken, each sip will bring you bliss.

Strawberry Wave Cheesecake: The recipe behind the flavor

Monday, August 11th, 2014 by

Like long days lounging at the Jersey shore, enjoying buckets of fried seafood and spectacular people-watching, Strawberry Wave Cheesecake coffee is a seasonal delight you won’t find anywhere else. Inspired by the glorious cake below — baked by our shipping supervisor Lori — it’s here for only a short, sweet time, so enjoy it while it lasts!

Strawberry Cheesecake

Cheesecake may not be the first dessert that comes to mind if you’re in the mood for something light, but this recipe, adapted from a letter published in a 1962 issue of Gourmet magazine, promises to be just that — for 1962 anyway. The original recipe, titled “Mrs. Davis’ Unsinkable Cheesecake”, was named for the creator’s unsinkable determination to create a fluffier, less disastrously caloric version of the classic dessert.


Ingredients

1 1/2 lb cream cheese

14-oz can sweetened condensed milk

4 large egg yolks

1 cup sour cream

1 tablespoon Confectioners sugar

1 teaspoon vanilla

1 teaspoon orange or lemon zest

Strawberry jam

For the topping:

2 pints fresh strawberries

3-6 tablespoons granulated sugar

1/2 tablespoon fresh lemon juice


Directions

1. Beat together the cream cheese and sweetened condensed milk. While beating, add the egg yolks one at a time and beat until very smooth.

2. Add the sour cream, Confectioners sugar, vanilla, and citrus zest.

3. In a separate bowl, beat 4 egg whites with 1/2 t salt until stiff. Fold into the cheese mixture.

4. Pour batter into a 10-inch springform pan lined with a cookie or crumb crust.

5. Drop spoonfuls of strawberry jam into the batter and cut through the jam and batter with a knife to create a swirl effect.

6. Bake at 275 degrees for 1 hour. Turn off the heat and let sit (door closed) for 45 minutes or more. The cake should cool completely in the oven. Remove from the pan when cold.

7. For the topping, mix 2 pints of fresh strawberries, sliced, with 3-6 T granulated sugar and 1/2 T fresh lemon juice. Serve on the side if you’re proud of your swirling knife work or just smother the whole thing in gorgeous juicy berries.


Strawberry Wave


Attention Coffee & Tea Lovers!

Monday, October 15th, 2012 by